The top toolbar has very few options available. More options are available for each report.
To perform any actions on a particular report, right-click the desired report, either in the thumbnail gallery or the file tree pane. The context menu (shown above) contains a variety of options, many of which are self-explanatory but are discussed below for clarity.
There is also a video guide linked HERE
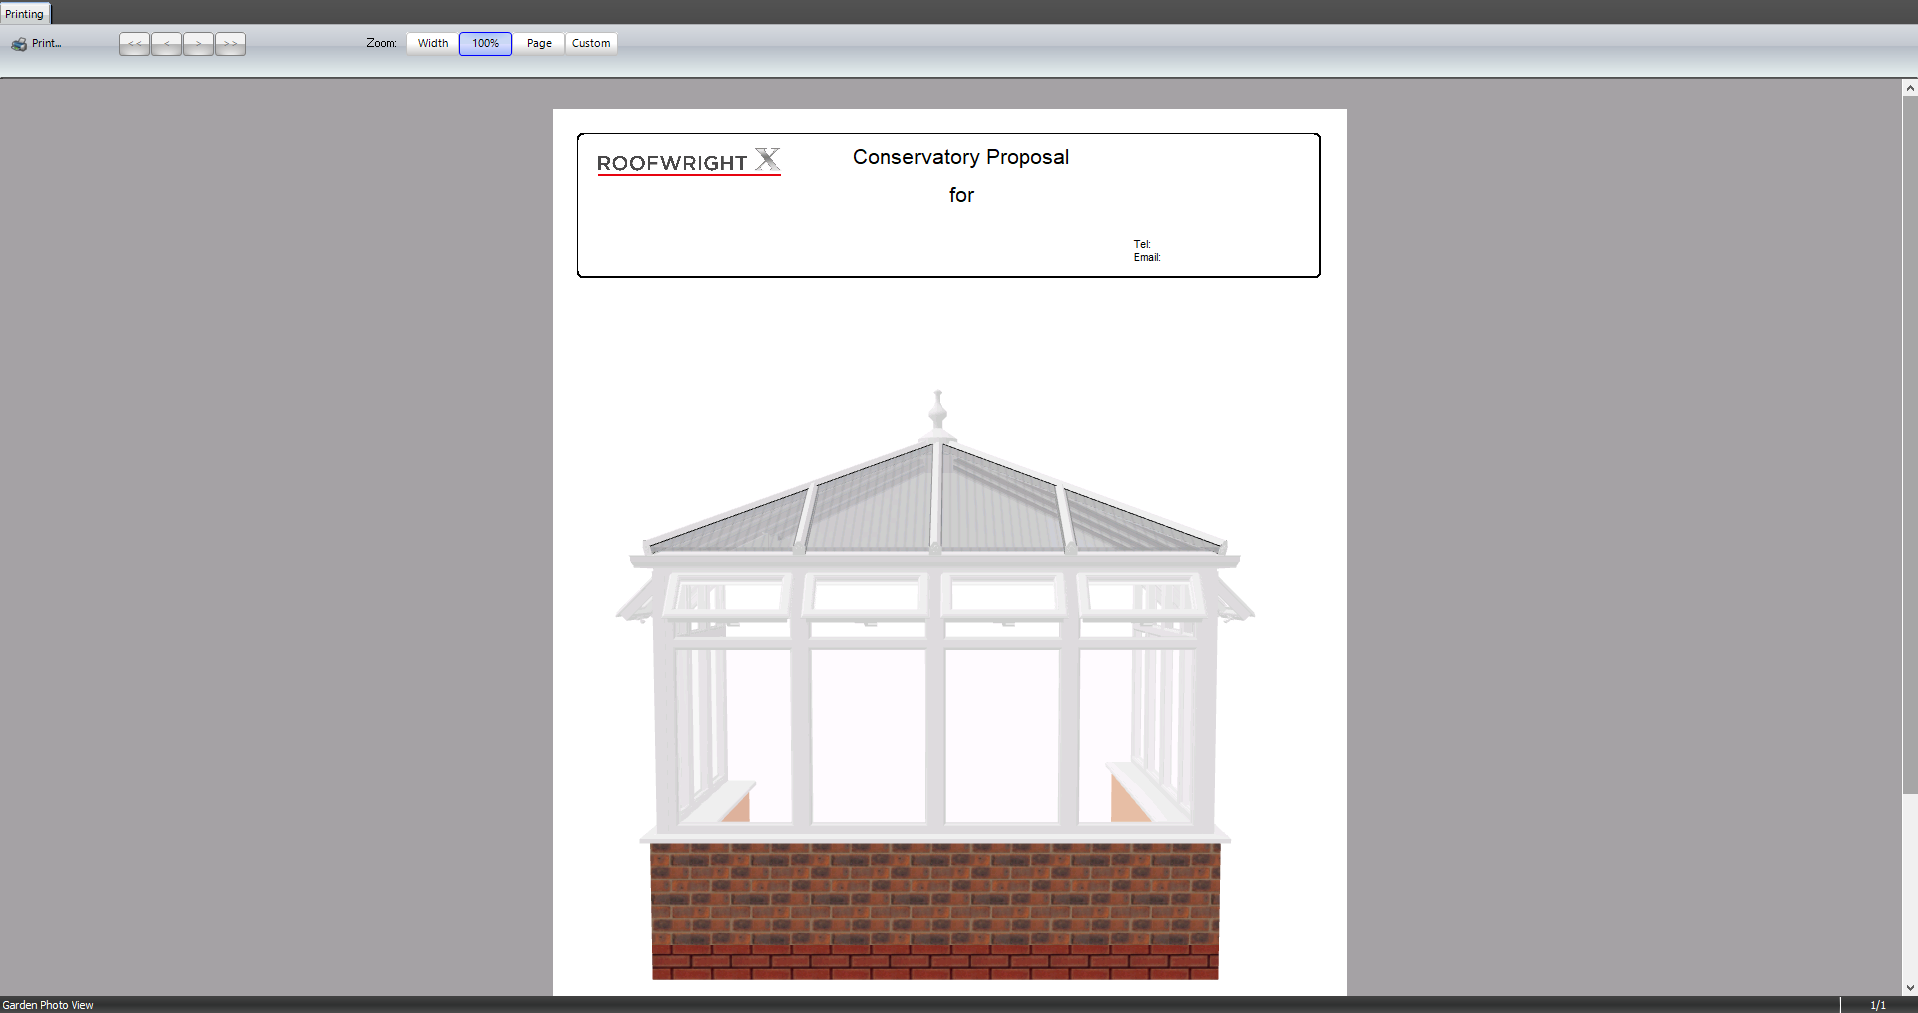
1 – Preview/Print this report
Displays a full-screen preview window of the selected report. From here you can progress by clicking Print, to send to the printer, save to PDF, or email as a PDF to a client or supplier.
2 – Edit Header/ Edit Footer
To edit the header or footer for any print report, either to add new data or remove data.
- Start by clicking Edit Headers And Footers from the top menu, then select the header or footer you would like to edit.
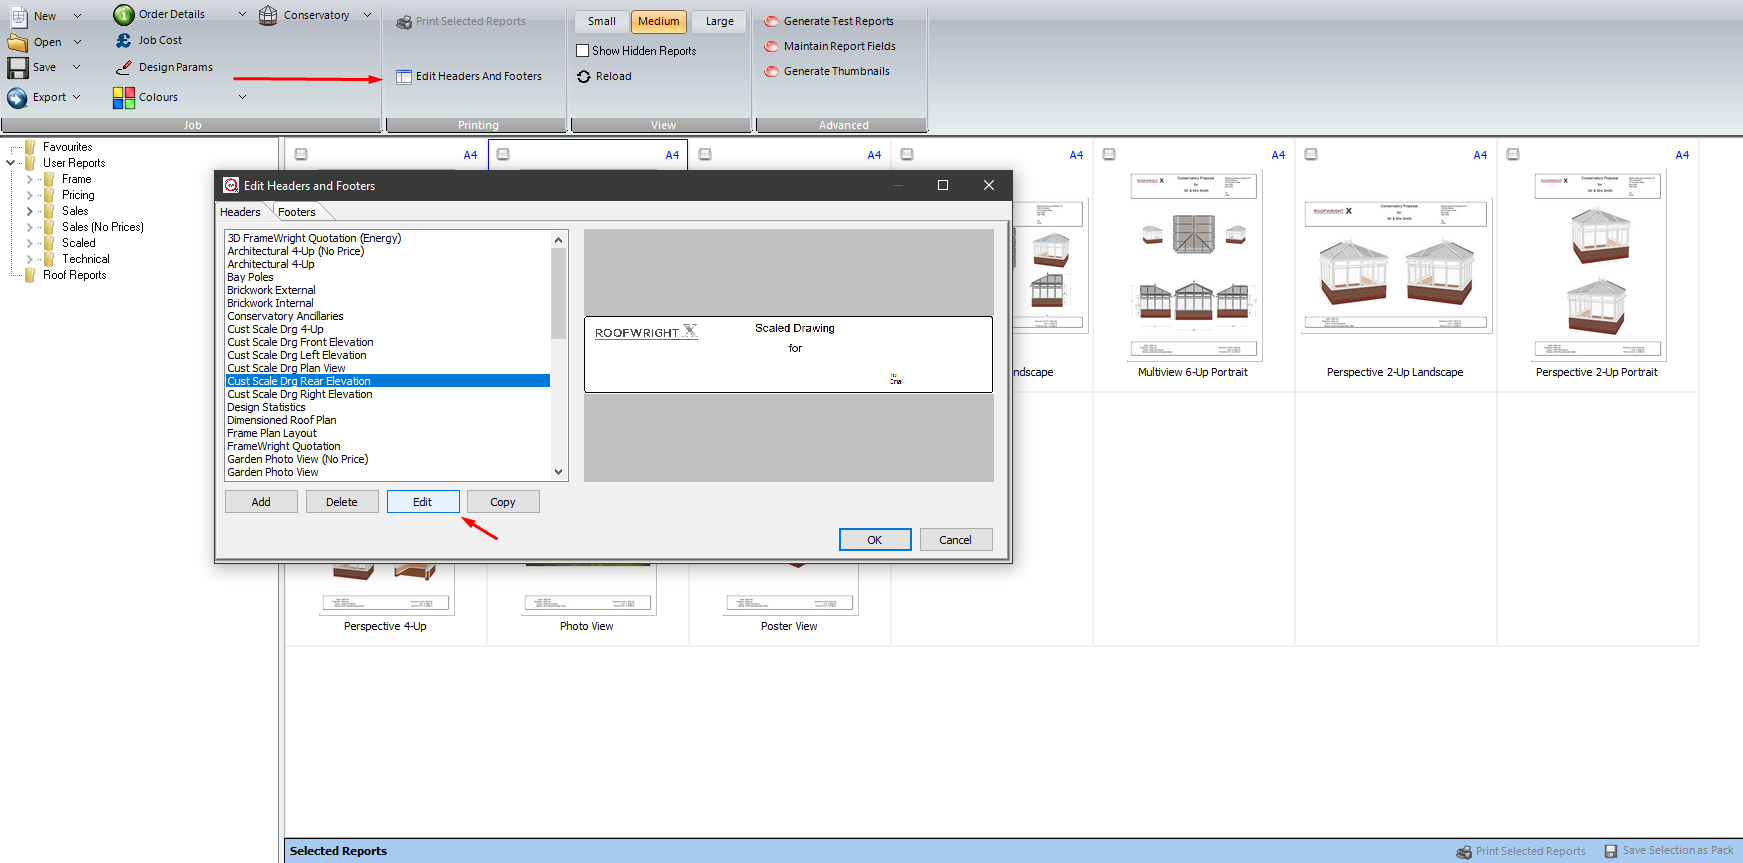
- You can change the layout, by increasing or reducing the number of columns from the drop-down menu. A border can also be added if required.
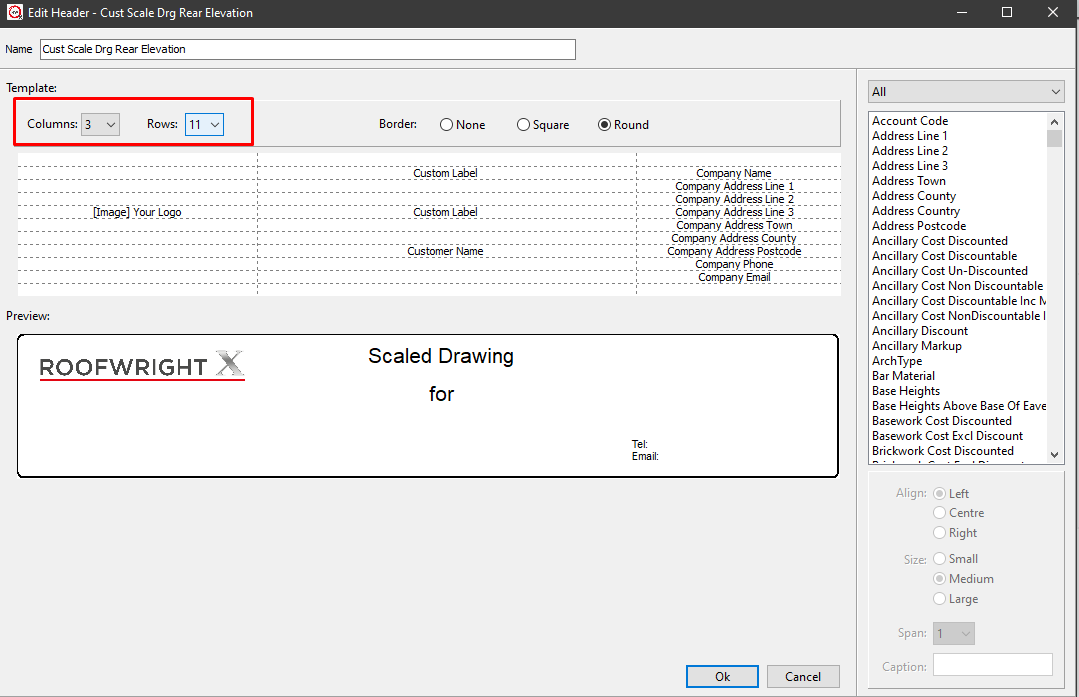
- To remove any unwanted fields from the design, simply click and drag them beyond the limits of the header or footer section.
- Similarly, to add new data fields onto your header or the footer, scroll through the list in the right-hand pane to find the data you want to display, then click and drag this into a position with which you’re happy.
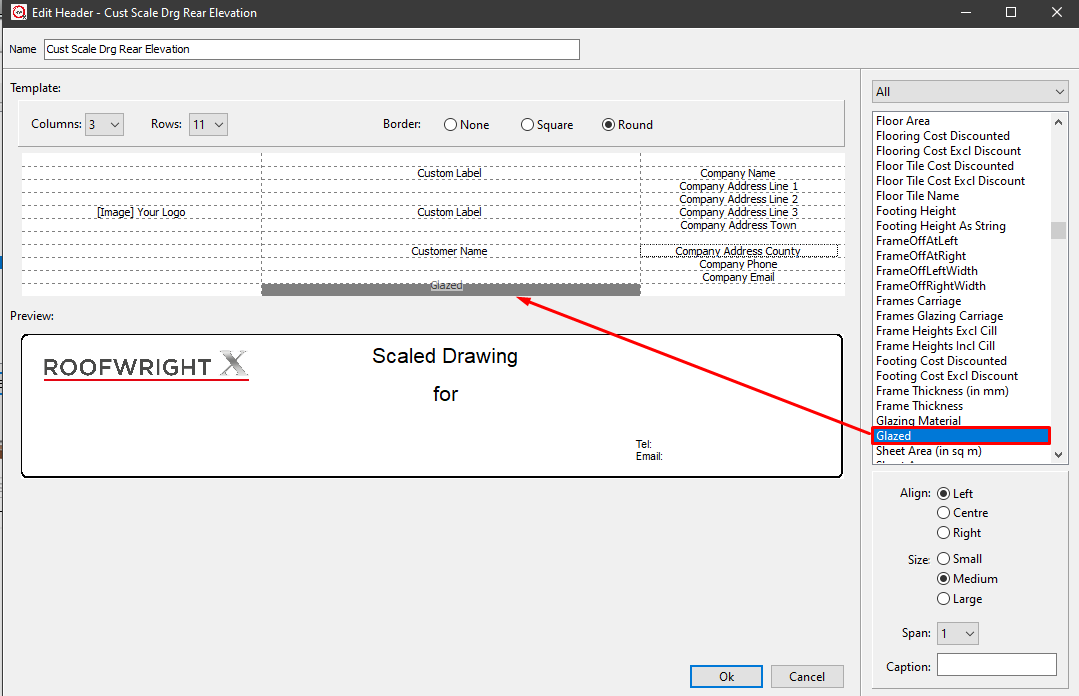
- The data you choose to display in the header/footer can be formatted by changing the text size and also aligned left or right to suit.
Also, you may wish to add a caption in front of any data displayed, to denote what the value relates to. For example, to add the caption "Email:" before the company email address, simply select the data field "Company Email", then type into the caption box "Email:". This will then present the caption before the data field.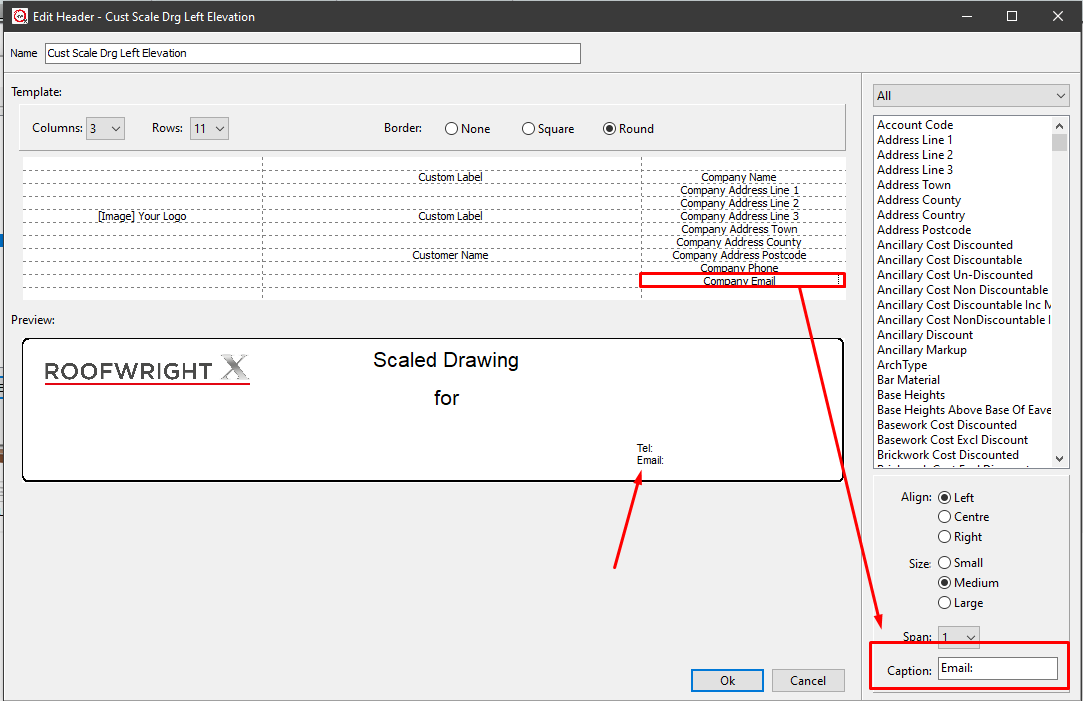
3 – Edit This Report
- To edit a report right-click on the report you want to edit, then click "Edit this report...".
- This will open the report editor. The "detail" section of this report is the main body of the report. In this section you will have different data fields, such as, in the multi-view 4-up report, "ExternalBrickworkLayout".
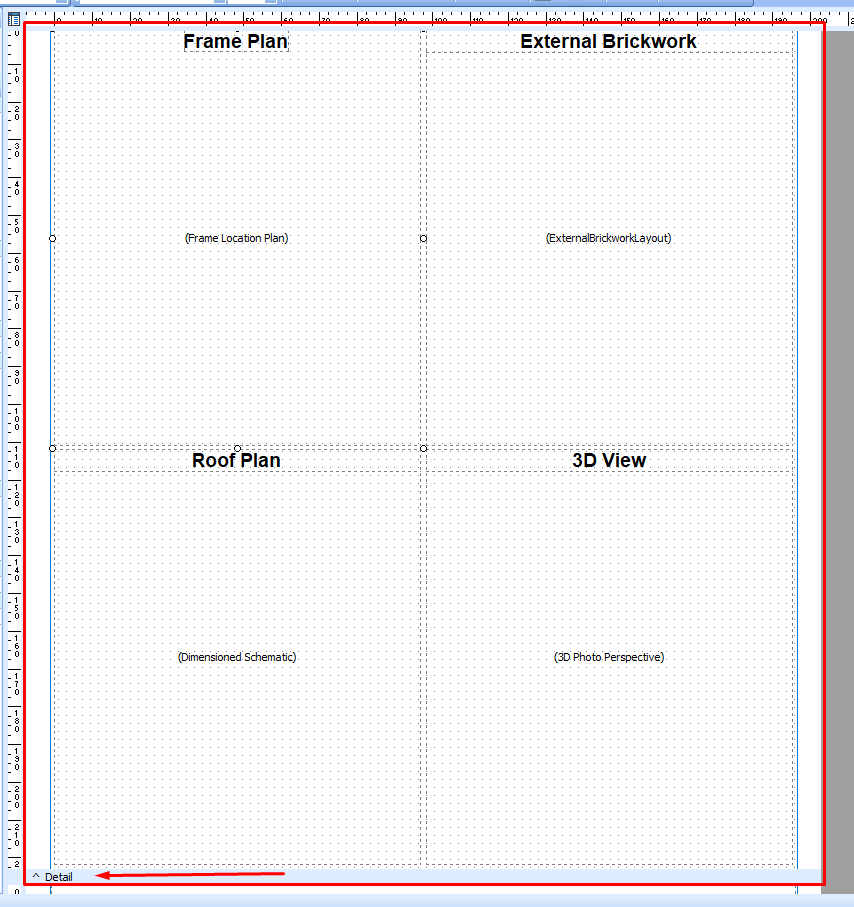
- As the report builder is far to complex to cover in this beginners guide I will give you a quick example of how to change the "ExternalBrickworkLayout" image to an internal layout image.
- First, change the title from "External Brickwork" to "Internal Brickwork". To do this just double click on the text and type in the new title.
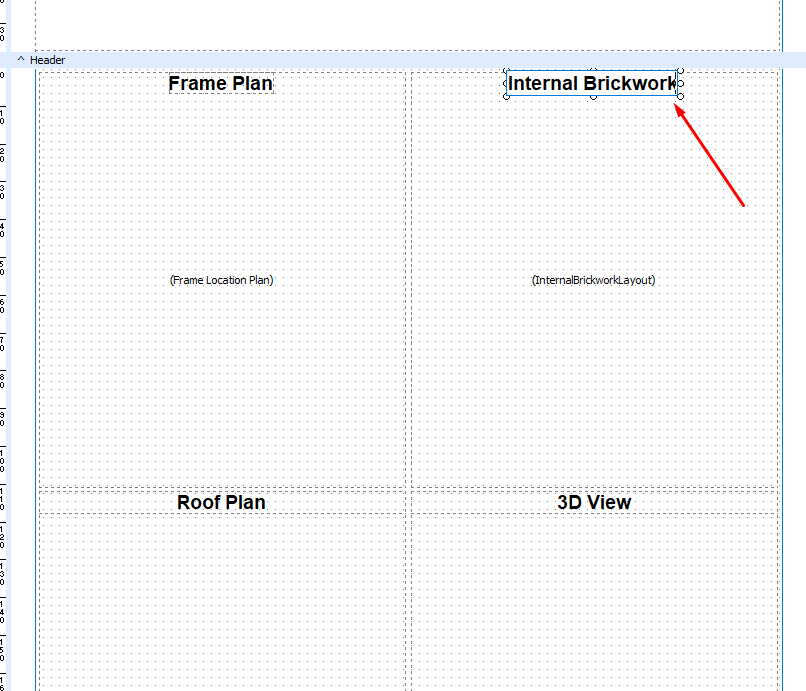
- Now you can change the image. First, select the data field you would like to change, in this case, the "ExternalBrickworkLayout". Then go to the top left of the screen and find "ExternalBrickworkLayout", next to the "drawing data" category. Repeat the process for each image you need.
- This process can be used to change any data field such as; price, drawing layouts, ancillary questions or drawing data.
4 – Copy This report
This creates a duplicate of the selected report. This option is ideal if you need two similar reports - just create a duplicate and make any minor adjustments to either the original or duplicate report. This saves you from having to create a new report from scratch.
5 – Properties
There are few operations you can perform within this menu:
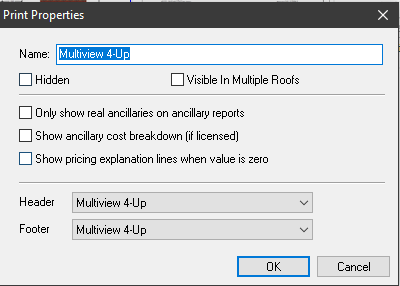
A. You can rename reports.
B. Reports can be hidden: ideal if you don’t wish to display a report in your gallery, but don’t want to completely delete it, in case you require it in the future.
C. You can choose whether only real ancillaries* are displayed.
D. You can choose whether or not a pricing explanation is displayed for zero priced items.
*Real ancillaries are those that are priced under the Ancillary category.
E. You can select the header and footer to use
7 – Favourite
Just like the Selected option, the favourite option works in very much the same way. If you do make a report one of your Favourites, it’ll appear in the Favourites folder.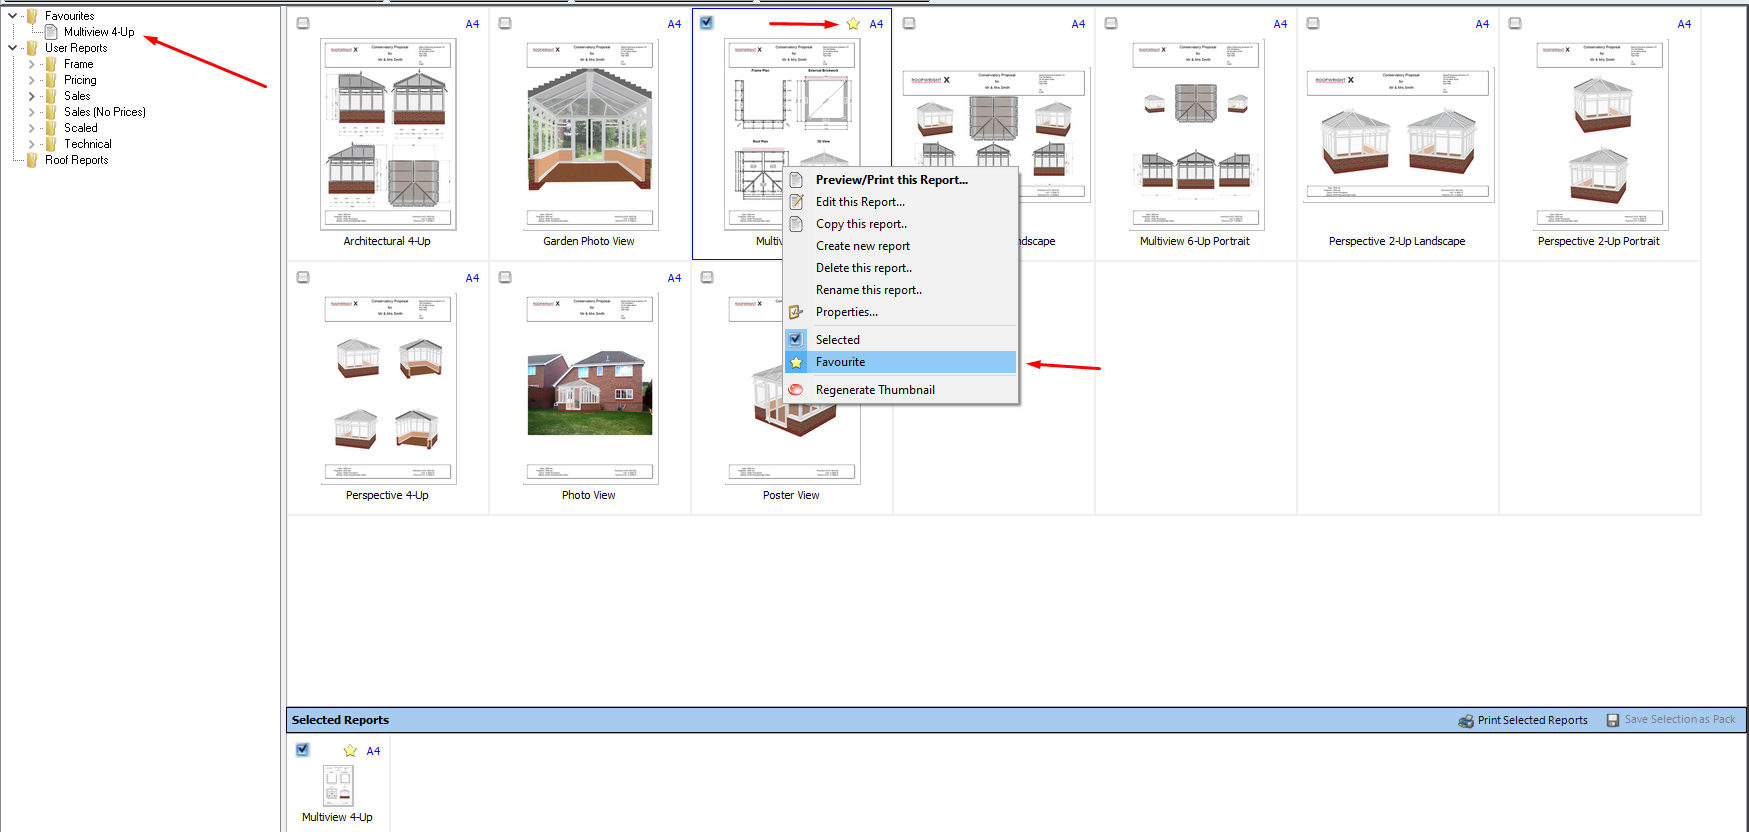
In the thumbnail gallery and the context menu (Right-click menu), a yellow star denotes that the report is part of your Favourites.
To remove a report from your favourites, right-click on the report and then click Favourite, the Star will now be greyed out and the report removed from your favourites folder.
8 – Regenerate thumbnail
If you change the design of a report drastically, you may want to update the gallery thumbnail image, click this to generate a new image.
If you are wishing to use existing or custom reports from an earlier version, once you have imported them, you will need to create thumbnails for the reports, following this procedure.