Overview
The first step to creating a bespoke design is laying out your walls. This is done by starting with a rear house wall and using the various arrow icons to create a continuous loop working anticlockwise.
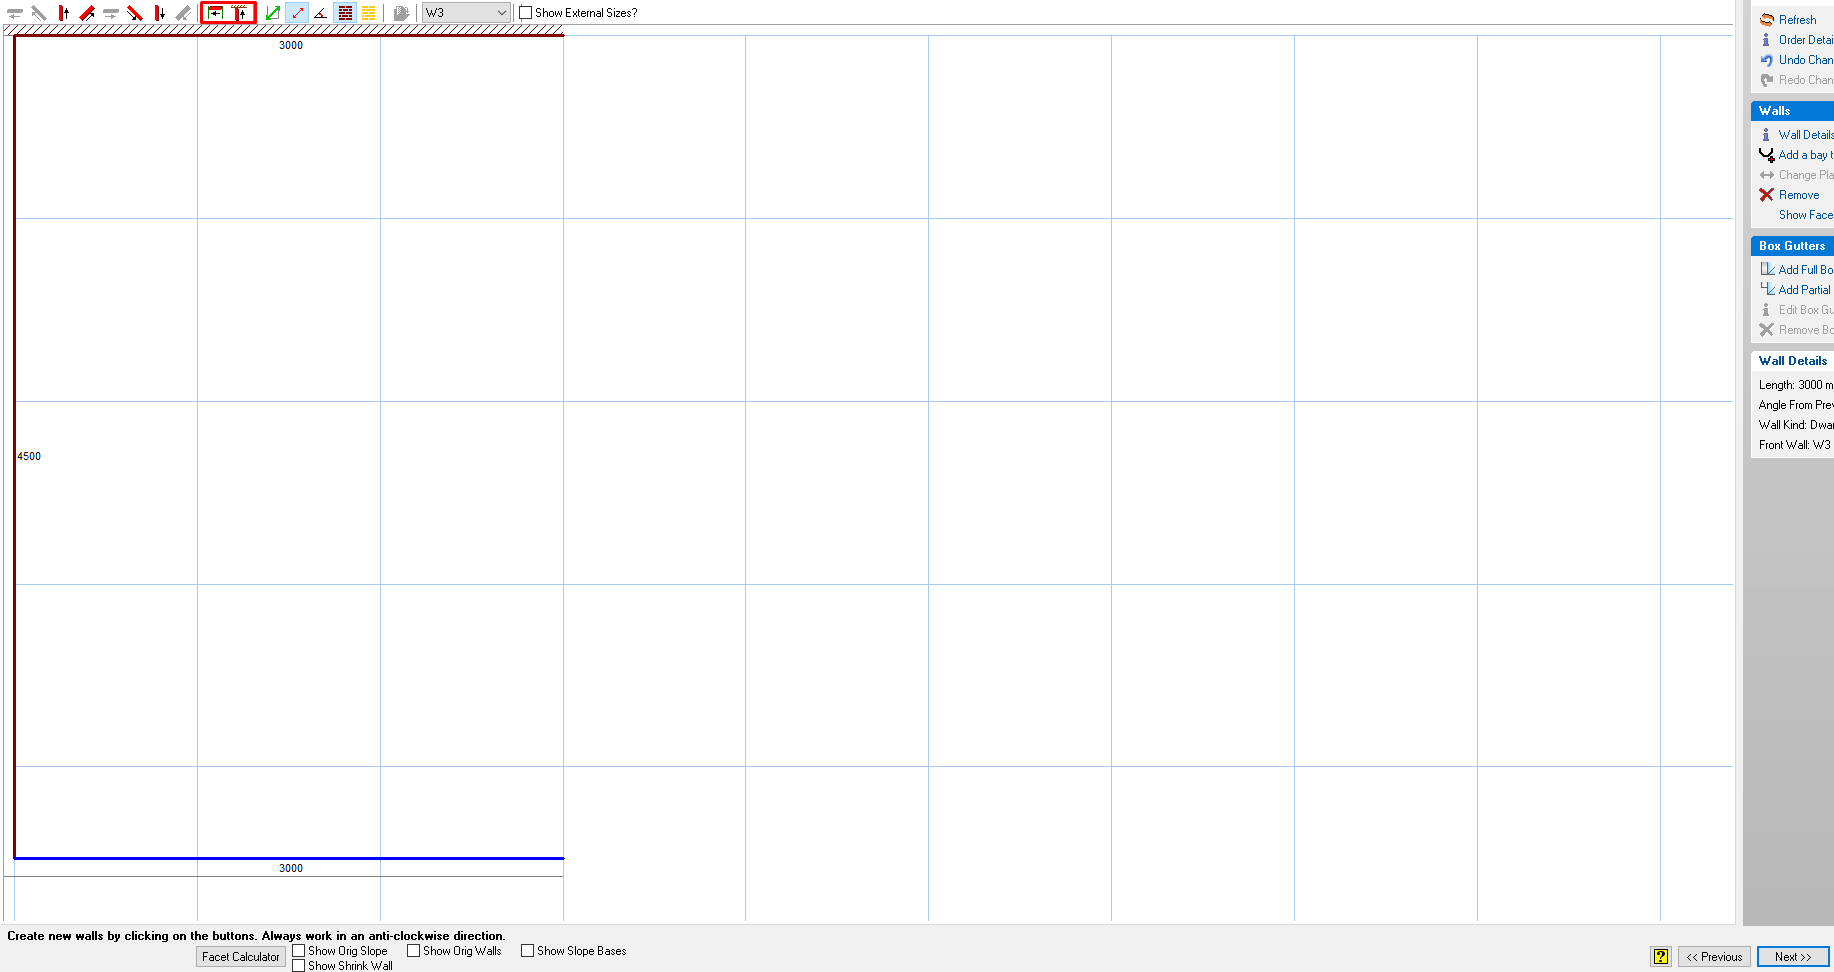
Draw in all your walls using the appropriate direction arrows at the top left of your screen, then use one of the special JOIN arrows (outlined in red in the image below) to create the final wall.
Each time you add a wall, a window appears to specify the length, the type of wall (dwarf wall, house wall, firewall or creasing tile wall), and the internal angle from the previous wall.
If the wall is a house wall, you can add a soffit width if necessary. You can specify the wall type at the point of entering its length, or you can double-click on the wall after its creation, to access its properties and change them if necessary.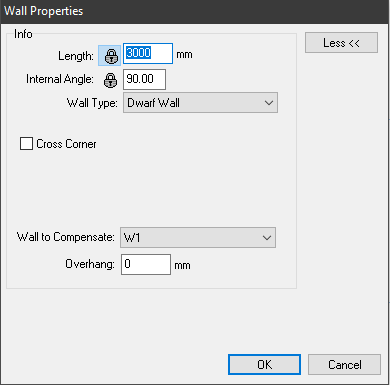
Two key points to remember during drawing in walls are:
-
Workaround the design in an anti-clockwise direction
-
Use the JOIN to house wall arrows when finishing your design, instead of the regular direction arrows, as this ‘tells’ the program that you are completing the ‘loop’.